| Home | Rides | Reviews | Bikes | Gallery | Tech | Misc | Contact |
| How
to Change Your Motorcycle's Tires by Martin Hackworth |
|
|
|
|
Do-it-yourself tire mounting and balancing is a task within the reach of most competent weekend mechanics. With care, patience and the right tools you can change a set of tires in just a few hours. Although mounting your own tires is not technically difficult it can be dangerous. Seating the beads on new tires involves rapid pressurization. Even a small volume of compressed air will produce an amazing boom should a tire rupture while you are working on it. Eyes, ears and fingers are all at risk. Please exercise appropriate caution and be sure to wear safety glasses at all times.
The directions that follow apply to most modern sportbikes or
standards. Dirt bike tires
are more
difficult to get on and off their rims and we’ll address them
separately in a
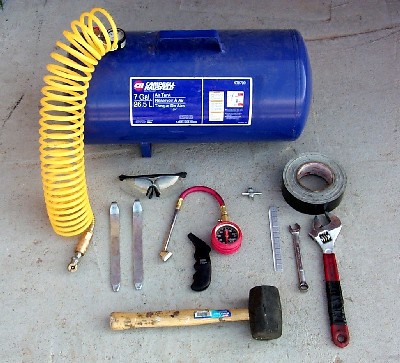
later article. You’ll need a work area with room to move around and enough space to bolt a tire-changing stand to the floor. Harbor Freight sells a very nice inexpensive motorcycle tire-changing stand (#42927) that bolts to their standard automotive manual tire changer (#34542). The hand tools required are two tire irons, a spray bottle with soapy water (any dishwashing liquid in water works just fine), a brush, gaffer's tape, a valve tool, a rubber mallet, assorted wrenches and/or sockets, an air pressure gauge, an air compressor, safety glasses and a helper - especially if it’s your first time. |
 |
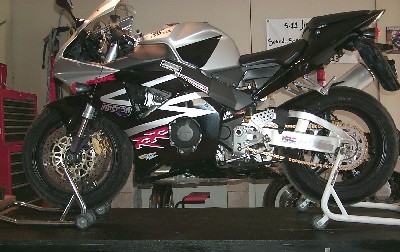 |
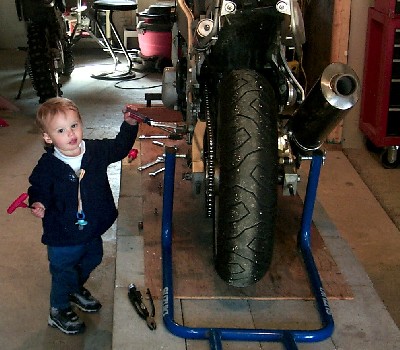
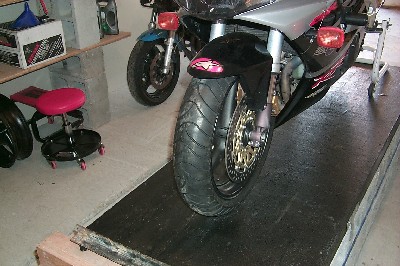
The subject bike is a CBR954RR that is being converted back to street duty from a weekend at the track. The CBR wheel setup is fairly typical of most modern sportbikes. First you must securely support your bike with the wheels off the ground. If your motorcycle is equipped with a center stand you’re set for rear wheel removal but you’ll still have to raise and support the front. Since many modern sportbikes don’t have centerstands the easiest and least expensive way to raise both ends is with a combination of a front wheel stand and a rear swingarm stand. Many stands which purport to be “universal” will not work with all bikes no matter how adjustable they are. Before purchasing stands you should be sure to check for compatibility with your particular bike. If your motorcycle is equipped with bosses for swingarm spools use spool stands. These are the ultimate for speed and security in swingarm lifts. |
|
We'll begin with the rear
wheel. The wider the
tire
the easier it generally is to remove from the rim so the rear is
the place to begin. After you’ve made sure
that
the bike is securely
elevated and supported the
next step is to take careful note of the arrangement of bushings,
washers,
alignment collars, chain tension indicators and nuts on the rear axle
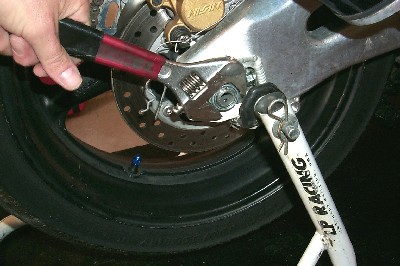
and swingarm. Once you’ve figured out how everything fits together (make notes if you have to) you should begin by removing the retaining pin from the axle nut and then removing the nut itself. Not all axle nuts have a retaining pin so don’t worry if there isn't one on yours. Unless it’s been previously over-torqued the axle nut should come off without a lot of effort. Though a large box-end wrench or socket is preferable for this task a crescent wrench works just fine on nuts as large as those found on motorcycle axles. |
 |
|
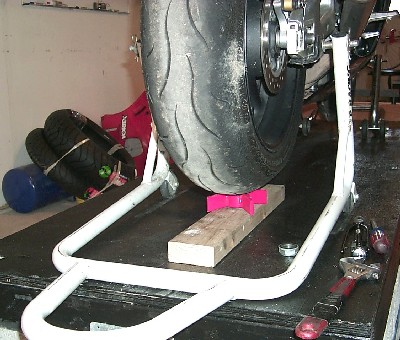
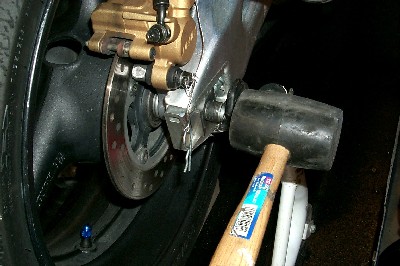
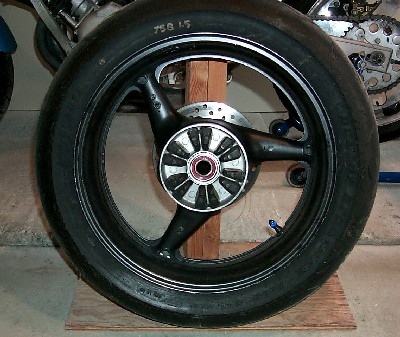
At this point you may find it useful to make sure that the rear wheel is supported (independent of the swingarm). This makes it much easier to slide the axle out without having to yard on it with a hammer. Anything that will fit under the tire and supports the wheel works. Make sure to clean the axle thoroughly while it's out and give it a light coat of waterproof grease before setting it aside. Be sure to be gentle while tapping the threaded side of the axle (use a rubber mallet or a block of wood against the threads). On most bikes the rear brake caliper will come off as you tap the out the axle and you'll want to be especially diligent in noting the position of any washers and bushings associated with it in advance of them falling out. |
|
Once the axle is out and you’ve carefully inventoried all of the hardware, noting where everything is going to go upon reassembly, you are ready to remove the rear wheel from the swingarm. Begin by pushing the wheel forward. This should introduce enough slack in the drive chain to remove it from the rear sprocket. Once the chain is off slide the wheel straight back to remove it from the swingarm. Modern chain driven sport bikes are equipped with a rubber cush drive for smoother operation. The sprocket should separate from the hub with just a firm tug. Be sure to make note of how the rubber cush drive bushings fit in the hub. The exact location of each isn’t really important, just how they are oriented in their slots (below). Place these and the sprocket aside. You are now ready to begin removing the tire. |
|
 |
|
|
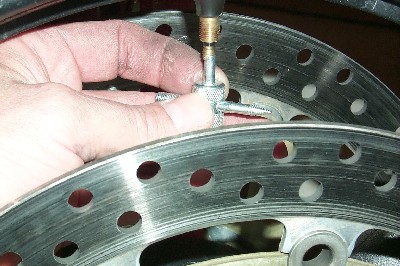
All modern sportbike tires are tubeless which makes the process of removal from the wheel relatively easy. The process begins with letting the air out of the tire. Remove the valve cap and use the pointed end of the valve tool to let the air out of the tire. When this is done use the slotted end of the valve tool to unscrew the valve stem being careful not to lose it in the process. It is also a good idea to note of the amount of torque required to loosen the valve stem (which isn’t much). When the air is out of the tire make sure to take note of the direction of tire rotation (there will be an arrow on the tire sidewall indicating the direction of forward rotation) with respect to the rim. On the rear wheel the direction of rotation is obvious because of the asymmetry in the hub. All you'll have to do with the rear is put on the new tire with the arrow pointing forward. Use tape and a Sharpie to mark the direction of forward rotation on the front rim before removing the tire. |
 |
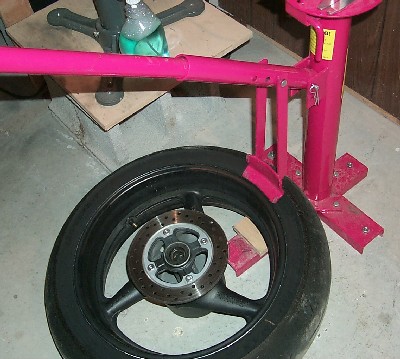 |
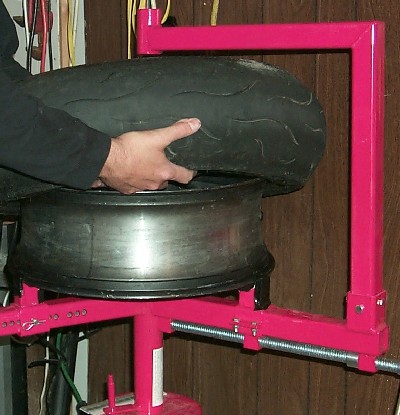
The final few steps in the removal process are made much easier with a tire changing stand like the Harbor Freight model shown at left. Be sure to bolt the stand to the floor of your work area with room to get all of the way around it. Using any lightweight tire stand in freestanding mode is tantamount to committing hari-kari. You'll want to use a few layers of gaffer's tape on the wheel clamps and plastic or rim protectors on tire tools and rims to protect your rims from scratches. Before the tire and wheel can be mounted on the stand you must first pop loose the bead that secures the tire to the rim seat. The lower part of the Harbor Freight stand has an attached bead breaker that works very well for this purpose. Use a piece of soft wood to cover the metal leg of the stand where the wheel is going to contact it. Place the tire on the ground below the shoe on the bead breaker as shown at left. Be extremely careful not to allow the brake rotor(s) to touch anything. Putting any substantial lateral force on brake rotors will warp them. Do this and you’ll rue the day you considered saving money by changing tires yourself. |
|
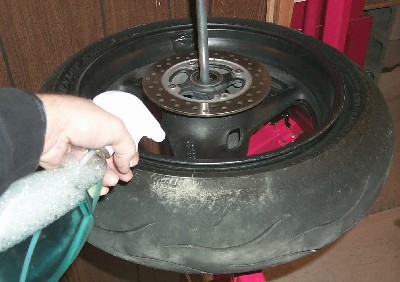
Most sportbike tire beads, especially on rear tires, will break from their seat with a small amount of soapy water and modest persuasion from the bead breaker. Some tire/rim combinations will pop so easily that you’d swear that you could have done it with your fingers. In general the narrower the rim the more difficult it is to unseat the bead but most street bike tires will come off with very little effort. Once you succeed in popping a section of the bead from the rim seat rotate the tire and use the bead breaker to free the entire upper bead. Flip the wheel over and repeat the entire process. Once you have the bead completely free on both sides of the tire you are ready to lift the wheel and mount it on the upper part of the stand as shown at the right. Be sure to tighten the clamps so that they hold the rim firmly but do not over tighten. It's a good policy to use the support rod supplied with the stand to prevent the rim from completely parting company with the stand should it slip out of the clamps. This is easier to accomplish that you might think. |
 |
 |
Now it’s time to break out the tire irons. You are entering a new and potentially catastrophic phase of the tire-changing process here so be careful. Whatever you do, do not use large automotive tire irons to remove a motorcycle tire from a rim. Use the short motorcycle irons available in all motorcycle shops. If you are doing things properly you don’t need much leverage from the irons to remove most tires. If you have to use a large iron you are most likely doing something wrong. Motorcycle rims are very strong longitudinally but will withstand relatively small amounts of lateral force along their edges before bending. Tweaking your rim is the third way your tire changing adventure ends prematurely. You must also exercise extreme care not to bend the brake rotors by pressing against them with your tire irons. Simian strength is worse that superfluous - it's hazardous to your wealth. |
|
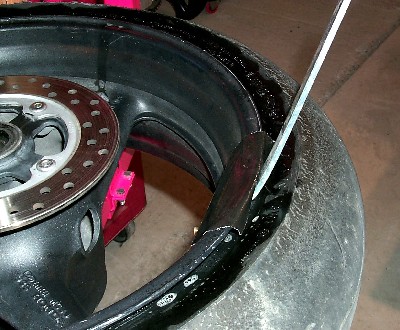
Use gaffer's tape or rim protectors to protect the rims in the area where tire irons contact them. Some use pieces of plastic bottles for the same purpose. Normally it’s not necessary to protect more than the 1/3 of the rim in the vicinity of where you are beginning because once you’ve got a third of the tire over the rim the rest comes off without much leverage. Once you’ve got a single iron inserted between the tire and rim as shown (make sure to use the dished end of the iron to hook the tire bead), use it to lever the bead up and over the outside of the rim. Hold this iron in place then insert the second iron between the tire and rim a few inches from the first and again lever the bead up and over the outside of the rim. This process is a lot easier if you force both beads on the opposite side of the tire from the location of the tire irons to the center of the rim. If you do this the bead should come up and over with very little effort. |
 |
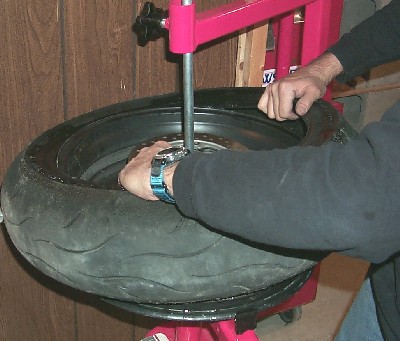 |
Once part of the bead is over the rim just repeat the process, moving the tire irons a little farther apart each time, until a big portion of the bead pops over the outside of the rim. Surprisingly little force is required if you are doing this properly. Make sure to use either gaffer's tape or rim protectors to keep the powdercoat or paint on your rims intact. If the bead resists a spray of soapy water (or furniture polish which works just as well) is much better than a gorilla-like effort with the tire irons. Once you get the bead on the upper side of the tire completely over the edge of the rim the lower side should come off easily with just your hands. Again the secret is to push the bead on the opposite side of the tire from where you intend to begin to the center of the rim. Do that and the tire should part company with the wheel with very little effort. Once the old tire is off you'll want to carefully inspect the seat and the edge of the rim. Clean dirt, rust and/or debris from the seat with a brush, clean up any water, oil or grease anywhere inside of the rim and carefully inspect the entire rim before mounting the new tire. |
|
Mounting the new tire is relatively easy and basically involves reversing most of what you just did. Make sure to observe the direction of the rotation arrow on the tire and to place the tire on the rim in the proper orientation. The only additional twist in mounting new tires is that they need to be balanced. This involves a couple of new steps that we'll cover in due time. That aside the greatest difference between removing old tires and mounting new ones is the hazard associated with the use of compressed air to seat the beads on the new tires. It is nearly impossible to exaggerate how bad this can go wrong if you do not exercise appropriate caution. When mounting the new tire the lower bead should go on easily with just your hands and a little soapy water. Be as sparing as possible with the use of soapy water (or furniture polish) because you don’t want a lot of it trapped inside the tire after you’re done. |
 |
 |
Alternatively you may use the tire tool supplied with the Harbor Freight stand once you have the upper bead partially over the rim. |
|
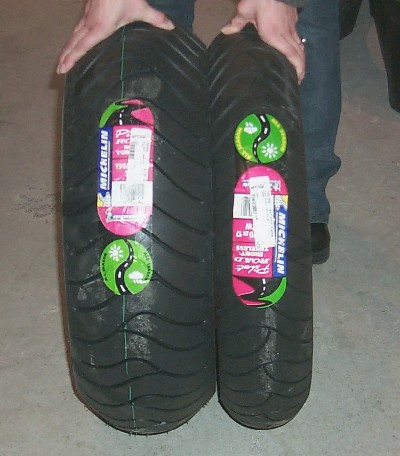
Once you get the lower bead over the top edge of the rim you’ll want to line up the balancing mark with the valve stem. Most tires will have a paint mark somewhere on the sidewall that marks the lightest part of the tire (don't worry if there isn't one). Since the heaviest part of the rim should be the area containing the valve stem the idea is to line it up with the lightest part of the tire. You can verify that the valve stem is the heaviest part of the rim on the balancing stand before mounting the new tire. On rare occasions you may encounter a paint mark located near the heaviest part of the tire. Unfortunately this will be discovered on the balancing stand after the tire is mounted. Fuming, cursing and swearing great oaths against the manufacturer are about the extent of your options prior to repeating the steps above. The upper bead will require the use of tire irons once you have it about half over the rim. Again use the soapy water sparingly and be very careful not to damage your brake rotors. Patience and finesse yield great dividends. Alternatively you may use the tire tool supplied with the Harbor Freight stand once you have the upper bead partially over the rim. The business end of the tool looks a little like a spade. The end with the lip goes inside the rim. Zip tie or tape a some plastic to the lever where it will contact the outside of your rim. Then insert the spade end of the top between the tire bead and the rim and lever it around the rim against the steel support rod in the center of the stand. Buttah! Once the tire is on the rim it’s time to seat the beads. You'll need an air compressor with a regulator to supply a large volume of air at low pressure. The idea is to get air into the tire fast. Set the regulator for a maximum pressure of 30 - 35 psi and with the valve stem removed inflate the tire. The beads should seat with two distinct pops. Usually these “pops” are loud and unmistakable but occasionally the beads will seat without a pop or with just a single pop. If the beads fail to seat you’ll have to try higher pressures but do so in small increments and with caution. Video. Once the beads seat listen for air leaking around the edge of the rim before removing the air chuck from the valve. Once you are convinced there are no leaks allow the tire to deflate, screw the valve stem back into the rim and reinflate the tire to the pressure recommended on the sidewall. |
 |
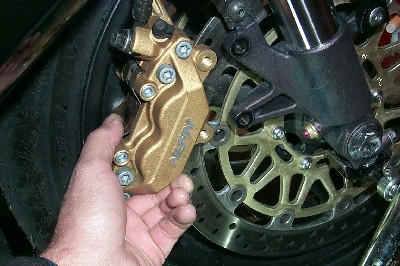 |
You are now done with the rear wheel and you can set it aside for the
time being. It's time for the front wheel. Changing the front
tire involves some additional complexity. The front
axle is generally secured to each fork leg with a pair of
pinch
bolts that must be removed prior to removing the axle itself.
Both front
brake calipers will generally have to be removed in order to get
sufficient
tire clearance to remove the front
wheel. The brake calipers are generally secured to the fork legs
with two
bolts each. Once the front wheel is removed from the bike the tire removal process is identical to that for the rear. As front rims are narrower the front tire us usually a little harder to remove from the rim but if you picked up the right touch with the rear tire you should have no real problem with the front. Front brake rotors are bigger and easier to damage so take your time and use caution. |
|
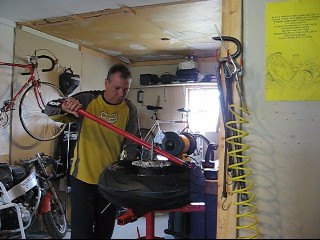
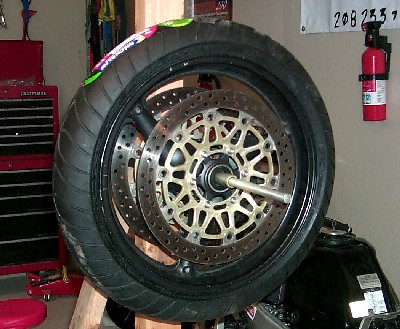
Once you’ve got both tires mounted and inflated its time for balancing. Proper balancing will enhance tire life and yield a much smoother ride. The only tools required for balancing tires are a stand (mine, pictured, is made from 2” x 4”s) that will accept a metal dowel (over which you will slide the axle for each wheel) and a pair of pliers to trim the wheel weights. Your stand needs to be level and the wheels need to be able to turn freely in it. You may find it helpful to have the wheel up around eye level. Before balancing you'll want to treat any nicks or scratches with a little touch-up paint. The wheels shown here have plenty of nicks and scratches from having tires changed in a hurry at the track. A little flat black paint does wonders for wheel cosmetics. |
 |
 |
The idea in basic wheel balancing is to determine where the wheel is heaviest by allowing it to rotate freely around it's axle to see if the same spot consistently settles to the bottom. If it does you add weights to the wheel on the opposite side of the rim until the wheel is balanced - meaning it does not settle in any one place after you spin it. I like the weights that have adhesive on the back. Just trim the weights until you have the proper number to achieve a good balance and viola, you’re done. The more care that you take the smoother the ride. It's amazing the difference that a properly balanced tire makes - especially at speed. |
|
The final step is to mount the freshly shod, meticulously balanced wheels back on your bike. If you were careful in noting how everything came off earlier this should not be a problem. It’s also a good time to check chain and sprocket wear and replace if necessary. Make sure to tighten all bolts to the proper torque specs, line up your rear wheel with the indicator marks, and leave at least 1” of free play in the drive chain. Be sure to do a careful inspection of the entire drive train and foot controls. That’s about it. The first time around you should budget a couple of hours for all of this but after a while you’ll be familiar enough with all of the steps that you can do everything much faster. Be sure to take it easy on fresh tires as they are very slippery until well scrubbed (typically a minimum of 50 miles of street riding). Highsiding a bike on fresh tires is an embarrassingly common occurrence even among those who should know better. Your brakes will also need a few pumps to bring them back to normal pressure and it’d be a good idea to do this in the garage instead of while attempting a stoppie at the first intersection you roll up to. |
 |
|
Tire
sidewall
information - Service specifications.
You'll need to understand the numeric
codes on the sides of your
motorcycle tires before ordering up replacements. Even
though you’ll probably
order replacement tires similar to the ones
that are currently
on your bike it’s still smart to understand what you are
getting. Aside
from proper
suspension setup tires are the most critical factor in determining the
handling
of your motorcycle. Racers are acutely aware of this and know how
subtle changes in tire compound influence adhesion and
wear. Aspect ratio and tire profile can also
have a
significant effect on motorcycle handling. Got a slow steering bike?
Try a more
triangular front tire. Dragging hard parts in corners? Try a higher
profile
rear tire. It’s just plain smart to understand the role tires
play in the handling characteristics of
your bike. When it’s time to purchase new tires you can retrieve the proper tire codes from either the sidewalls of your old tires or by looking up the manufacturers recommendations in your service manual. If the tires on your bike are OEM’s and are working well for you just get replace them but bear in mind that OEM spec tires are frequently compounded differently than the same, non-OEM tire. If you want the exact tires that came on your bike from the factory be sure to order the OEM variants but expect to pay more for them. |
|
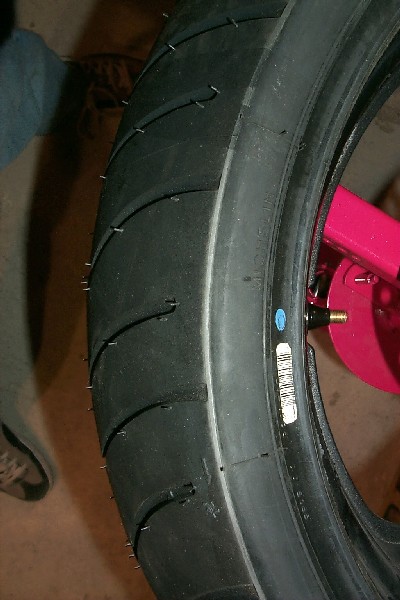
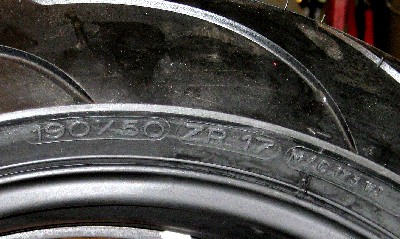
The code embossed on the side of the tire shown at right is 190/50 ZR 17 M/C. This refers to a width of 190 mm, an aspect ratio of 50% (meaning that the height of the tire is 50% of width), a speed rating of Z (rated for continuous use at 150+ mph), R is for radial construction, 17 indicates that the tire is for a 17 inch rim and M/C simply means that it is a motorcycle tire. Speed ratings are based on European ECE 30 Indoor Wheel Test Standards which go from A to Z. Motorycle speed designations go from S rated tires good to 112 mph through ZR rated tires good for sustained 150+ mph. More recently the W designation has been created for 168+ mph and the Y designation for 186+ mph. While it may be tempting to spoon on the widest tire that will fit on a rim you should understand that this changes the aspect ratio of tires in a way that often produces less adhesion at high lean angles. Tires wider or taller than OEM’s may also cause clearance problems. Most racers actually prefer the narrowest, highest aspect ratio tires that they can mount on their rims for better adhesion at high lean angles, less rear wheel steering and better ground clearance. |
 |
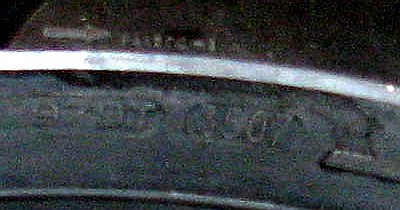 |
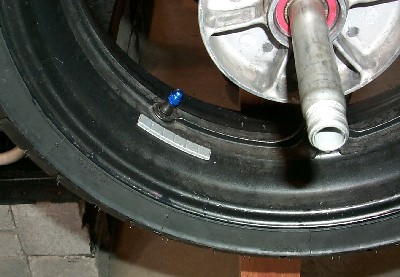
You can tell the age of motorcycle tires, and hence their shelf life, by checking the date code embossed on the tire. Date code formats vary but for modern sportbike tires the code should look like the one in the photo below (i.e., 3507). This tire was built in the 35th week of 2007. Avoid older tires.
|
| Home | Rides | Reviews | Bikes | Gallery | Tech | Misc | Contact |